Nail Art and Cosplay: How to Master Gel Paint
Key Takeaways
- Gel paint is used for decoration, applied after building the nail and applying the base color.
- It cures under a UV/LED lamp and does not air-dry, offering extended working time for intricate details.
- It requires specific precautions, notably the use of a dedicated lamp and awareness of potential contact allergies.
- Applying a final top coat ensures excellent scratch resistance when handling cosplay props.
When a costume is finally finished, the wig is styled, and the armor is meticulously painted, one detail often makes the difference at conventions or macro photoshoots: the hands. Professional photographers hunt down every little detail that brings a shot to life. For cosplayers, the art of nail decoration has become a fully-fledged prop-making discipline in its own right, demanding the exact same quality standards as the rest of the outfit.
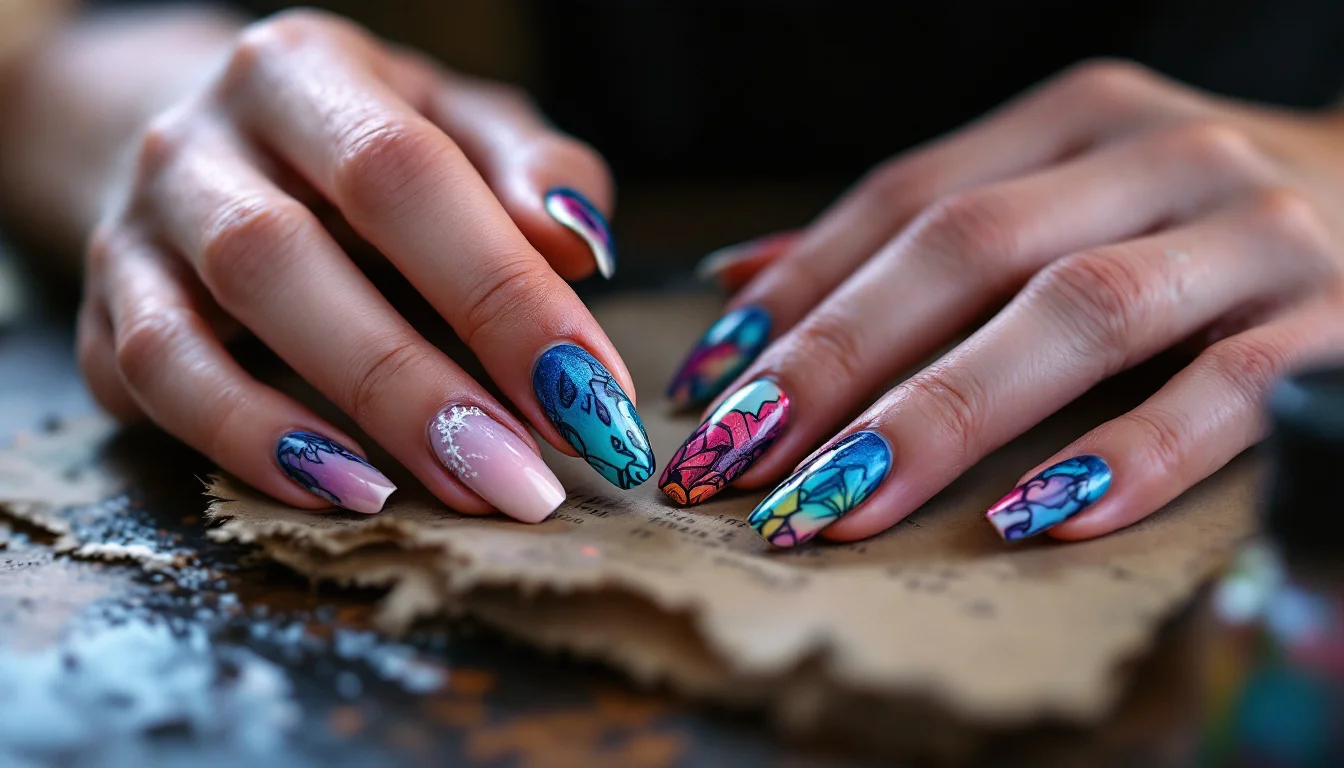
Gel paint serves as a brilliant alternative to traditional nail polish for precision work, though it does require some practice. According to the technical guide in the decoration section of Kit-manucure.com, gel paint is a gel that cures under a UV/LED lamp, but it stands out due to its exceptionally thick texture and highly concentrated pigmentation. This specific chemical formulation is a game-changer when it comes to reproducing narrative elements tied to a character. Because gel paint doesn't air-dry—it cures under a UV/LED lamp—designs can be reworked endlessly before being set under the light. Creators enjoy extended working time to perfect a complex facial expression, precisely adjust a guild logo, or sculpt demanding 3D textures. It's a medium that follows the same rules of meticulousness as miniature modeling, offering excellent control before the artwork is permanently set.
Why is Gel Paint Chemistry Perfectly Suited for Cosplay Character Design?
How Does Gel Paint Achieve Flawless One-Coat Coverage?
Replicating the aesthetic of a video game or Japanese anime requires flawless, solid blocks of color. Characters often sport highly vibrant color palettes with sharp contrasts. The intense pigmentation of gel paint ensures perfect coverage in a single coat, resulting in crisper, more vibrant designs—ideal for nail art. Having to apply multiple layers to achieve an opaque color would ruin the delicacy of the work and create an unappealing, bulky thickness on the nail plate.How Does Its Viscosity Provide Ultimate Line Control?
The other major advantage lies in the product's exceptional viscosity. Traditional liquid polish tends to spread, drowning fine lines in an accidental blur. Fortunately, the thick, creamy texture of gel paint prevents running and gives you ample time to work, making complex details and precise drawings possible. When creating intricate patterns, the medium stays exactly where the brush places it.As noted by specialist supplier M'Nails, precision nail art requires a highly pigmented gel paint that doesn't run and stays firmly in place. The material acts like a pictorial modeling clay. It merges the intensity of paint with the malleability of a professional gel. This combination allows enthusiasts to translate ultra-detailed designs onto the nail without worrying about colors bleeding or accidentally mixing before they are cured under the light.
How to Prepare Your Nails for a Gel Paint Cosplay Manicure
At What Stage of the Manicure Should You Add Details?
Adding these meticulous details is part of a highly structured manicure process that demands both patience and method. Gel paint is used purely for decoration: the nails must be clean and dry, with the nail structure and base color already finished—typically applied after the two coats of color. Therefore, it is absolutely not meant for building extensions, creating an apex, or reinforcing the natural nail; rather, it provides the final artistic touch that elevates the structure.What Are the Necessary Technical Prerequisites?
While this medium offers nearly infinite creative possibilities for reproducing fictional universes, it does require a solid technical foundation. Applying gel paint in nail art demands a degree of experience and manicuring skills; practicing beforehand is highly recommended.Cosplay enthusiasts—already accustomed to handling demanding materials like high-density EVA foam, epoxy resin, or thermoplastics—will need to master the miniature brushwork techniques. The fundamentals of nail technology must be solidly understood beforehand to ensure optimal durability during a public event.
What Are the Limitations and Safety Precautions?
Using gel paint comes with very real constraints that need to be anticipated: the process requires a material investment, including the mandatory purchase of a UV/LED lamp, and removal—usually done with a specific solvent or by filing—is time-consuming. Furthermore, handling products containing acrylates carries a documented risk of contact allergies and skin sensitization, necessitating careful application without letting the product touch the skin.How to Transition from Prop Painting to One Stroke Nail Art
The leap between crafting a giant broadsword and executing a manicure is more natural than it seems. Weathering, zenithal highlighting, or edge highlighting are standard practices in any armor maker's workshop. Before the advent of modern gel paints, the One Stroke technique was traditionally done with acrylic paint—a method originating from wood or canvas painting that was later adapted for nails.
Artisans who used acrylics often faced a major hurdle: the paint's rapid air-drying time. Creators used to hand-painting their props will find a similar logic in shading, but with vastly improved comfort. The introduction of "no-wipe" gel paints has revitalized the One Stroke technique, offering better durability, striking color intensity, and smoother application directly onto gel or semi-permanent bases.
This major material evolution eliminates the constraints of acrylics. The sweeping motion, essential for adding depth to a miniature blade painted on a nail, can now be executed with a flawless glide. The color never dries on the brush bristles, allowing you to stretch the pigment until you achieve the exact luminous transition you desire.
Armor and Weapon Nail Art: Which Technique for Which Cosplay Effect?
To successfully integrate it aesthetically, each element of the costume must correspond to a specific material approach.
How to Master Pure Line Work
For guild crests, tribal symbols, or facial tattoos, precision is vital. Whether replicating a scouting legion emblem or tracing a cyborg's geometric scars, brush application requires a fine liner nail art brush: you pick up a tiny amount of gel paint and draw directly onto the nail to create crisp patterns or lines.How to Replicate Magical Energy Effects
Mages, witches, and cosmic entities possess a unique aura that should radiate right down to their fingertips. Sponge application leverages the formulation of gel paint to create seamless gradients, baby boomer, and baby color effects. This approach diffuses the pigment to simulate radiating energy or a spell mid-incantation.How to Create 3D Texture and Relief
Armor design is often driven by a desire to harmonize textures. To replicate dragon scales or robotic rivets, you need volume. Applied in targeted areas, gel paint allows for 3D patterns like the "sweater effect," applied with a liner brush or dotting tool, curing between each layer.How to Paint Dynamic Metallic Shadows
Weapon shading—often done with an airbrush on life-sized props—finds its miniature equivalent here. The brush is the core tool of the One Stroke technique: it must be flat or angled, with soft yet resilient bristles, to create a seamless transition between two colors and produce a realistic metallic effect.How to Create a Matte Texture Effect with Acrylic Powder
Altering Gel Shine for Tactile Finishes
Characters from fantasy or post-apocalyptic universes rarely sport smooth, pristine outfits. To recreate the look of battle-worn clothing, a thick wool cape, or even rough stone, a clever technical trick can alter the natural shine and smooth finish of the gel. Acrylic powder can be applied over the design to enhance the 3D textured effect.Generously dust this fine powder over the uncured gel paint design; the material will absorb the particles. After the mandatory curing under the lamp and meticulously dusting off the excess with a soft brush, you're left with a surface that is completely matte, porous, and textured to the touch. This clever twist on a classic manicure technique is highly effective for imitating fur, magical frost, or raw fabric, adding a fascinating tactile dimension to the nail art.
How to Seal and Protect Your Cosplay Nail Art
The Final Light Cure
Once the hours of meticulous work are complete and the design perfectly matches the character reference, the final cure sets the artwork permanently. After designing, curing is done under a UV or LED lamp; it generally takes about 30 seconds under an LED lamp, though you should always carefully follow the specific instructions of the product being used.Why Apply a Clear Protective Shield?
A cosplayer's hands are put to the test throughout the day: repeatedly adjusting wigs, handling occasionally heavy props, and rubbing against rigid armor pieces. To mitigate these constant risks of damage, applying a thin layer of top coat after curing seals the design, adds shine, and protects the gel paint to extend its lifespan. This finishing polish truly acts as a protective seal, offering excellent resistance against daily wear and tear.Conclusion: Nail Art as the Finishing Touch in Cosplay Crafting
Pushing the boundaries of costume making means treating every visible inch of the body with creative intent. Mastering these light-curing resins elevates the standard of a performance, transforming your fingertips into miniature narrative dioramas that tell a character's story. To perfect the overall harmony of a costume, the nails serve as an additional canvas for expression. This cosmetic expertise opens up thrilling new immersive possibilities for costume creation enthusiasts.